
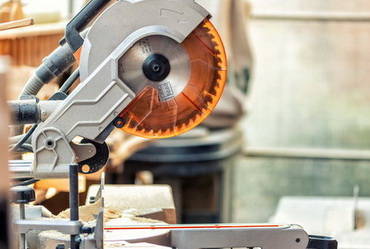
Before going through how to build a miter saw table blog, we need to know what a miter saw is. Well, a miter saw table is an absolute necessity in most workshops. Also known as a chop saw but most commonly referred to as a miter saw, this tool comes in handy on different occasions. You can rely on it when you are carrying out a woodworking project and want to achieve precise crosscuts and compound angles.
If you have ever worked with a compound miter saw in any woodshop, then you may have noticed that it has a long table. This table runs on both sides of the miter saw and serves the purpose of keeping the stock properly in line. It also helps to level out the miter saw on the table. You might have worked with a miter saw stand. It is also an essential part of a mitre saw. You also need a miter saw blade. Without these, woodworking is surely a difficult job.
When you are not in a woodshop, your best bet when making use of a compound miter saw is to combine it with a portable stand. And there are a lot of variations of a compound miter saw just like there are variants of miter saws.
You will find that when you decide to go for the commercially sold miter saw tables, they usually come with some setbacks. They are either too heavy or very challenging to set up. Or they don’t have the right support that can hold up long stock pieces. Not to mention that they are quite expensive.
For all these reasons and more, we thought it wise to come up with this article to help you build one for yourself just like we did. And no, you won’t need to break the bank to do this.
Tools/items you will need for building a Miter Saw Table
- Miter saw
- Table saw or hand saw
- Panel saw (or you could have the woods cut for you at the place of purchase)
- Drill with bits and pencil
- 1 x 6 x 10 wood board
- 4 x 8 plywood
- 2 or 32 x 4 x 8 wood studs
- Screws and nails for fastening
- Nuts and hanger bolts (4 pieces of the size that will fit your miter saw)
- Earplugs, safety glasses, and tape measure
- Square and clamps
Now that we have all the items listed out, let’s get down to the process of how to build a miter saw table.
First Step: Measure your miter saw
You need to first take the depth, width, and height measurement of the miter saw in question. When measuring the width, make sure to measure the entire saw. And then add a little extra so that it will be easy when taking the saw in or out. We went with 25 inches when constructing ours.
For the depth measurement, you need to take the table’s minimum depth. Make sure it is deep enough such that the saw base can sit on it comfortably. If you like having some space, you could make yours 18 inches deep like we did.
And now we come to the height measurement. Bear in mind that this measurement is the most important. Make sure to take the measurement from the base all the way to the miter saw surface (the place you place your items when cutting). Also, ensure that the base is on a flat level when taking the measurement.
You can either choose to make use of scrap material and take the height directly or subtract the plywood’s thickness by 2x to get the right divider height.
Second step: Cut your plywood
Please take note that for our miter saw table, the measurement we made use of are: 8 inches wideness, 18 inches depth, and 25 inches spot for where the miter saw will be. On the right side of the table we have 25 inches, and on the left is 46.5 inches.
Now, you need to rip the plywood into first an 18 inches strip and then a 17.75 inches strip that will be used for the top and bottom of the table. Please note that one part of the plywood needs to be thinner than the other so that it can be used at the back.
In our case, we made use of a ¼ inches plywood and had a ¼ inches thin top piece. The back part has to be cut to the same height as your miter saw. Don’t forget to consider the thickness of the bottom part.
Next, cut out the piece that will be used on top of the plywood. Take this piece from the shorter part so that there will be enough space for your miter saw. You can either use a panel or circular saw to do this. It depends on the width of the plywood, though.
When cutting out the width, it should be the same as that of the miter saw. Use the miter saw to cut out the back piece.
Third step: Create your dividers
Using the hand or table saw, rip the 1 x 6 to meet with the miter saw height. Remember to take into consideration the top and bottom of the table. Mark out the same measurement as that of the table top’s width which is 17.75 inches in our case.
You proceed to clamp down a piece of scrap to create some stop block. This will enable you to cut the 6 dividers evenly and quickly. Do this right where you are or you could decide to measure off the 6 dividers individually.
Using a tape measure, mark out the 1 x 6 ripped part and draw a line on it making use of the square. Then cut out 6 dividers that will be used in creating table support.
Fourth step: Assemble the table
Now that we have everything cut, it’s time to assemble them all. Before nailing or screwing any nuts, make sure everything corresponds to the correct measurement. Once you are sure of that, you can then go ahead and screw or nail each part together.
The way we did ours was to first nail the studs and bottom piece together. Next, we nailed the top pieces and the dividers. Then we flipped the wood over and screwed the bottom to the top piece. Put some nails on the back to make room for the miter saw.
Once the miter saw has been properly positioned, mark out space for it and drill out some holes where it will be placed. A hanger bolt will ensure that the saw remains in one place while you are doing this. Once all the nails and screws have been taken care of, you then soften everything up with rough grit sandpaper.
How to build a miter saw table – Final Thoughts!
Now, that’s how to build a miter saw table yourself without having to hire it out. If you follow the 4 steps we listed out above, you will have your standing and ready for use in no time.
Hope this article was helpful. And if you have any questions or recommendations, you can leave them in the comment section.


Leave a Reply